How to Build a ROCK 5B+ Encoder Rig for IRL Streaming
A hands-on build guide for a ROCK 5B+ BELABOX rig: flashing, wiring, case protection, and connecting it to an IRLHost relay.

The ROCK 5B+ only earns its keep once it is flashed, wired, and pointed at a relay correctly.
The ROCK 5B+ is one of the most common single-board computers behind IRL encoder rigs, usually running BELABOX as the encoding software. It has the CPU headroom for encoding, the ports for HDMI capture and cellular modems, and a big community around it. This guide walks through the actual build: hardware, flashing, first boot, protecting the board, and pointing the finished rig at a relay.
What you need
- A ROCK 5B+ board (4GB is enough for most single-camera setups)
- A high-endurance microSD card, U3-rated, from a reputable brand (Kingston Canvas Select Plus and Integral Ultima Pro are both well tested in the community)
- A capture card if you are feeding it from a camera over HDMI, or a phone/USB source if not
- One or more 4G/5G modems for bonding, plus a stable home network connection for the initial setup
- A USB-C power delivery power bank — the board is picky about voltage, and cheap power banks are the single biggest cause of random crashes and reboots on stream
- A case to protect the board once it leaves your desk
Flash the encoder software
Download the latest BELABOX image from belabox.net and flash it to your microSD card using Balena Etcher. Etcher verifies the write automatically — let it finish the check rather than skipping it, a bad flash is a common source of boards that never show up on the network.
Once it is flashed, insert the card into the ROCK 5B+, connect it to your router over Ethernet for the first boot, and plug in power. First boot takes a few minutes while it finishes its own setup. Keep an eye on your router's connected devices list — a new device will appear once the board is ready.
First boot and belaUI
Open the board's IP address in a browser to reach belaUI, BELABOX's web interface. The first thing it asks for is a password — this protects the interface, not your stream, so pick something you will remember. From here you control everything: network settings, encoder pipeline, and start/stop.
Protect the board before you go anywhere
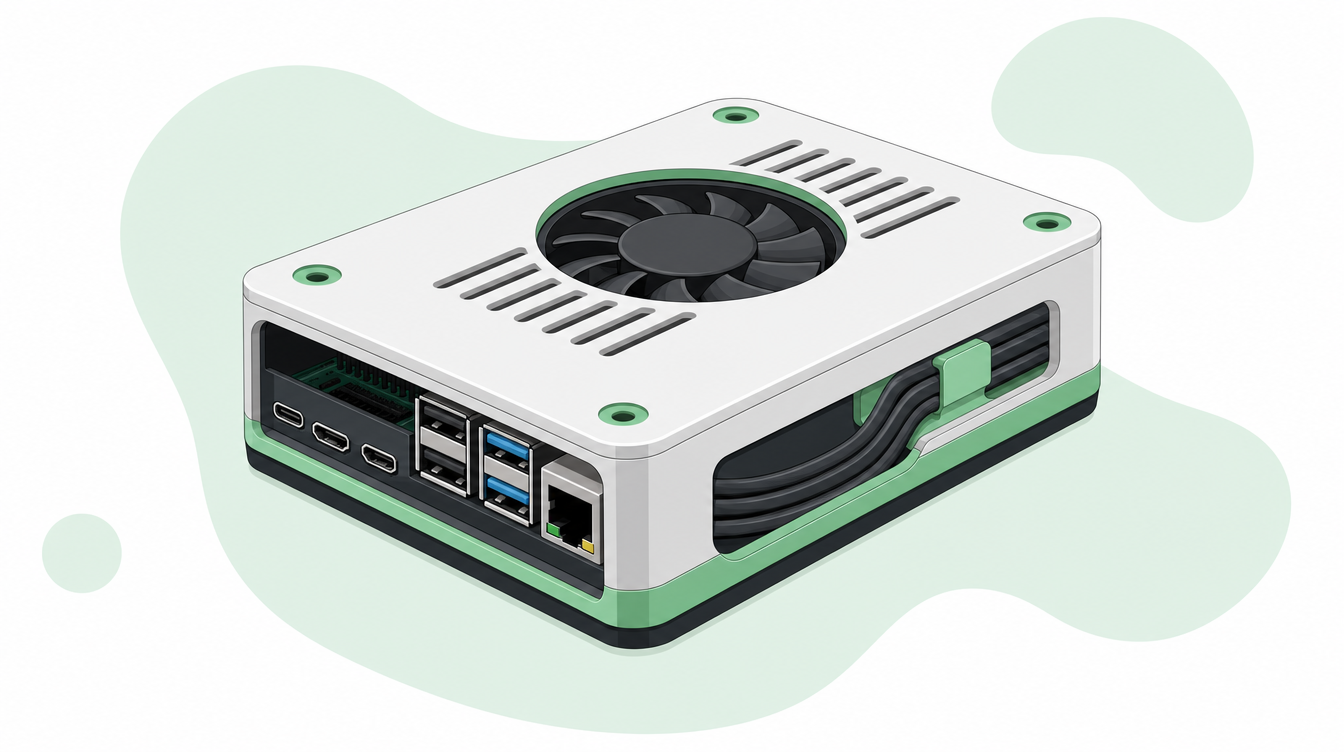
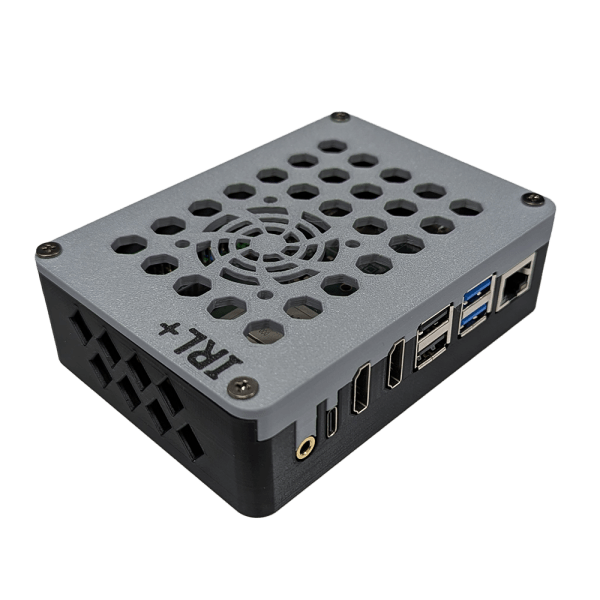
The board itself has exposed ports and a bare PCB. Bumps, rain, and a backpack full of cables will find the weak point eventually. We have been pointing streamers to IRLPlus's ROCK 5B+ case — a two-part design with an extended cable protection bay, a lid option with space for a 40mm fan, and a hole to reach the SIM card without opening the case each time you swap networks.
Configure your encoder pipeline
In belaUI's encoder settings, pick the pipeline that matches your capture source. Set a fixed frame rate rather than leaving it tied to the input — 30fps generally looks better than 60fps at typical IRL bitrates. If your camera has audio/video sync issues (common with some action cameras), there is a delay adjustment here to bring them back in line. It is also worth turning on the bitrate overlay while you are testing, so you can see BELABOX is alive even before a camera is plugged in.
Set up bonding
Add your modems under the network settings in belaUI and confirm each one shows as connected. Bonding combines them into a single, sturdier connection — the more independent networks you can add (different carriers, plus WiFi where available), the less a single dead signal affects your stream.
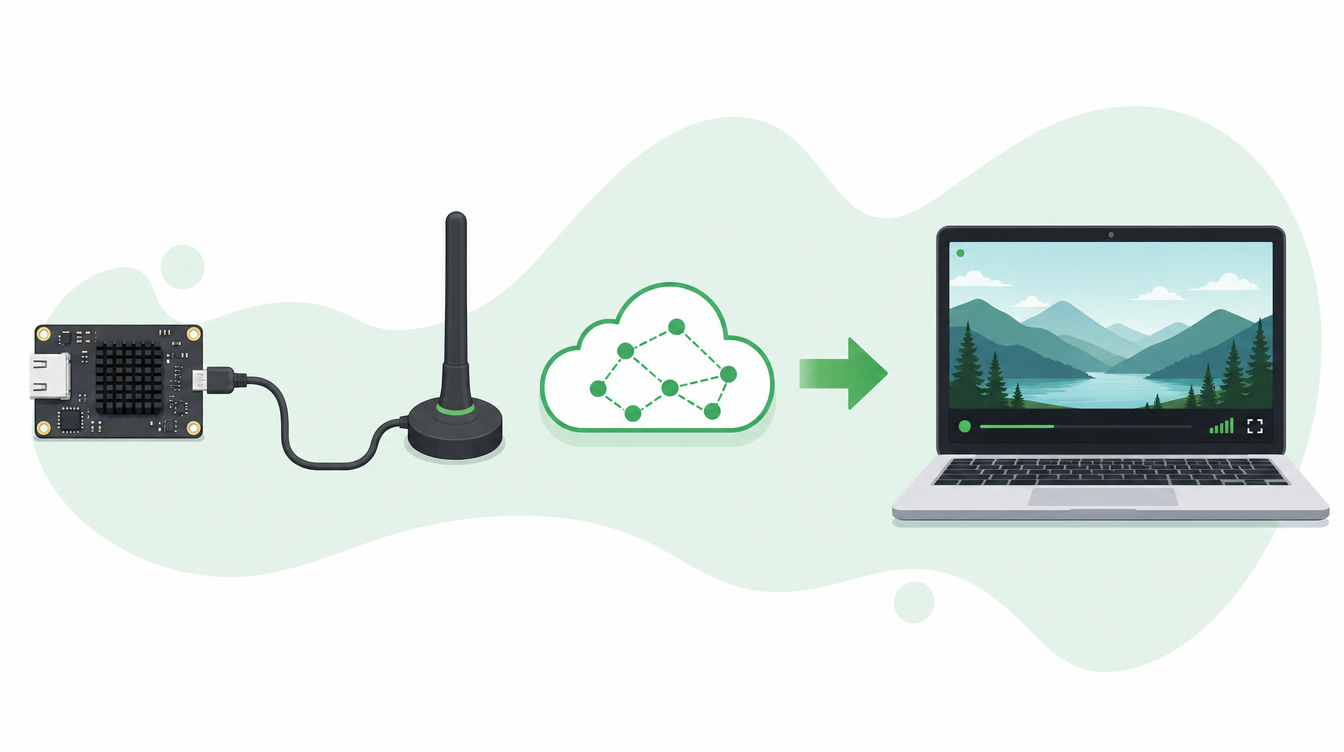
Point it at your IRLHost relay
Once the board is encoding, connect it to a relay instead of streaming directly to Twitch or Kick. A relay smooths out the bonded connection and re-sends the stream to your destination, so short network hiccups do not show up as a dropped stream.
In your IRLHost dashboard, create a relay server and open its connection details for a generic SRT/SRTLA source. Enter the address, port, and stream ID it gives you into belaUI's SRTLA settings, and set latency to around 2000ms as a starting point — go higher, up to 3000-4000ms, if you are streaming somewhere with patchy signal. From there, IRLHost forwards a stable feed to your OBS setup (at home on Plus, or IRLHost Studio in the cloud on Pro), which is what actually goes out to Twitch or Kick.
Test before you go live
Start the encoder and confirm the bitrate climbs steadily rather than stalling or bouncing to zero. Test on battery power alone, with the case fully closed, for at least as long as your planned stream — heat and power issues that do not show up on a desk often show up after 20-30 minutes in a backpack. Check that mod-facing scene switching or reconnect handling (IRLHost Link, our take on NOALBS, if you are using it) is set up so a brief drop does not knock you fully off air.
Get started
Once the ROCK 5B+ is flashed, cased up, and pointed at a relay, the rest is normal streaming setup. Sign up at irlhost.gg to get a relay endpoint. Plus starts at €11.99/mo + VAT, Pro from €29.99/mo + VAT if you also want IRLHost Studio and IRLHost Link.
Want help with your IRL setup?
Leave your email and a seller can contact you with setup help, a walkthrough, or a specialized IRLHost offer.